Broccoli Fritters

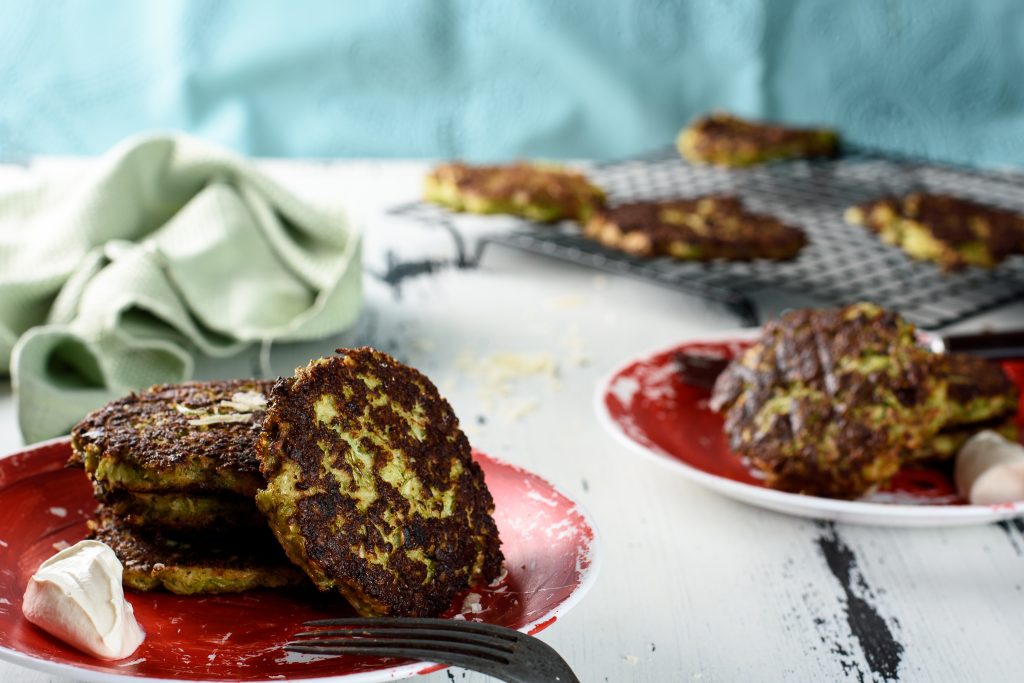
Looking for hiding vegetables from plain sight or just really into broccoli? Let’s make broccoli fritters and hide veggies no more!

As I lately have some time, I had been surfing on the web the other day. Trying to find fresh, intriguing ideas, inspiring recipes that I have never tasted before, to treat my loved ones with. Looking for a while yet could not discover too many interesting stuff. Just before I wanted to give up on it, I stumbled on this yummy and easy dessert by chance. The dessert looked so scrumptious on its photo, that required immediate actions.
It had been not difficult to imagine the way it is created, how it tastes and how much my husband might enjoy it. Actually, it is rather simple to delight him when it comes to desserts. Anyway, I went to the blog: Suncakemom and used the detailed instuctions that were coupled with great snap shots of the procedure. It just makes life much easier. I could imagine that it’s a slight inconvenience to shoot photographs in the middle of baking in the kitchen as you will often have sticky hands and so i really appreciate the commitment she placed in to build this post .
With that in mind I am inspired to present my own, personal dishes in a similar fashion. Many thanks the idea.
I had been tweaking the initial recipe to make it for the taste of my loved ones. Need to mention it was an incredible success. They enjoyed the flavor, the consistency and loved getting a treat such as this during a lively workweek. They ultimately wanted even more, a lot more. Thus next time I am not going to make the same miscalculation. I’m going to multiply the quantity to keep them happy.

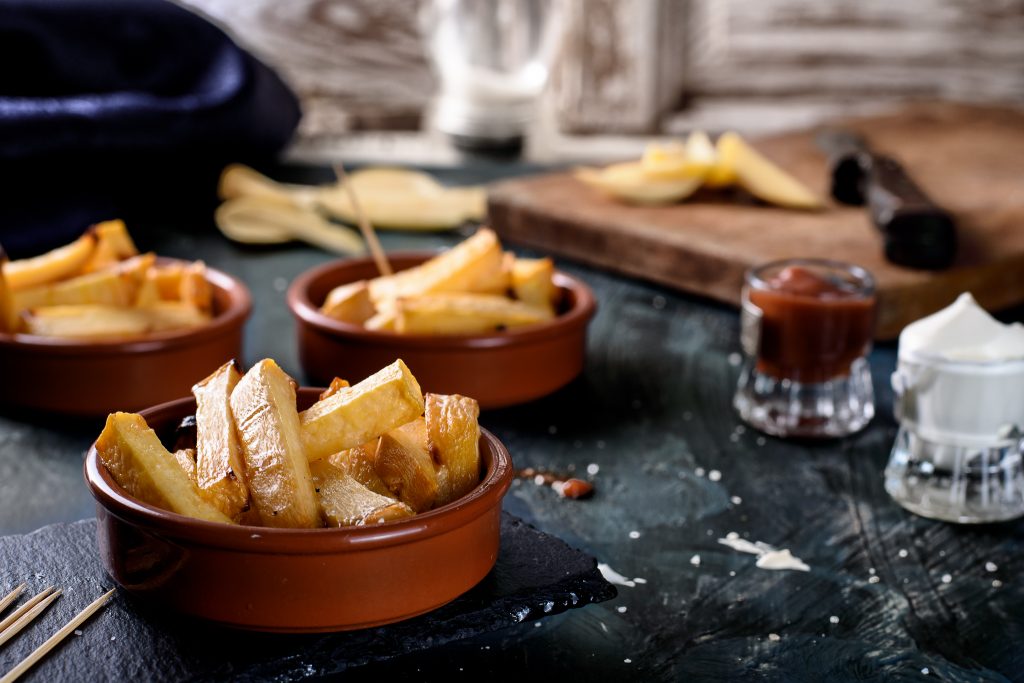
There are more Broccoli Fritters at SunCakeMom


Instructions

Take the broccoli to florets. The smaller the better.
Rice the broccoli florets by chopping them up in a food processor. Alternatively a fine shredder or sharp knife can also be used.
Microwave the riced broccoli until totally heats up. It takes about two minutes on the highest setting.
Get a cheesecloth or a not so precious kitchen cloth and wrap a batch of hot riced broccoli up tightly.
Squeeze out the excess water as much as possible. 1lb broccoli may yield about a cup water.
Add the cheddar, finely cut onion, eggs, salt and any optional spices and herbs then mix it well together.
Make balls out of the broccoli fritters dough. Alternatively make disc shapes. Heat a tablespoon of oil to medium and add the broccoli balls.
Spread them out by pressing them down with a spatula. Apply a thin film of oil on the spatula so it won’t stick.
Fry until golden brown then flip to the other side. It takes about 4 minutes on medium heat per side.

Notes
Enjoy!
Nutrition (per serving)
Calories: 110kcal (6%) – Carbohydrates: 4g (1%) – Protein: 7g (14%) – Fat: 8g (12%) – Saturated Fat: 4g (25%) – Polyunsaturated Fat: 1g – Monounsaturated Fat: 2g – Trans Fat: 1g – Cholesterol: 54mg (18%) – Sodium: 267mg (12%) – Potassium: 184mg (5%) – Fiber: 1g (4%) – Sugar: 1g (1%) – Vitamin A: 530IU (11%) – Vitamin C: 41mg (50%) – Calcium: 171mg (17%) – Iron: 1mg (6%)

Ganache Frosting

Can we embrace mistakes or the pursuit of perfection can’t abide them in our life? Let’s make chocolate Ganache that will help us enjoy life!

As I most recently have a little time, I was searching on the internet last week. In search of fresh, fascinating ideas, inspiring recipes that We have never tried before, to amaze my family with. Looking for quite some time but could not discover too many interesting stuff. Just before I wanted to give up on it, I found this scrumptious and easy treat by chance on Suncakemom. The dessert seemed so scrumptious on its snapshot, it called for urgent action.
It had been not so difficult to imagine how it’s made, its taste and just how much my hubby will probably enjoy it. Actually, it is very simple to delight the guy in terms of puddings. Yes, I’m a blessed one. Or maybe he is.Anyhow, I got into the website and used the comprehensive instuctions that have been combined with superb pics of the method. It really makes life rather easy. I can suppose it’s a slight inconvenience to shoot pics in the middle of cooking in the kitchen as you ordinarily have sticky hands so that i sincerely appreciate the hard work she put in to make this post .
Having said that I’m inspired presenting my very own formulas similarly. Many thanks for the idea.
I was tweaking the initial mixture to make it for the taste of my family. I can tell you it was a terrific outcome. They loved the flavor, the consistency and loved having a delicacy like this in the midst of a stressful week. They ultimately asked for even more, a lot more. So the next occasion I’m not going to commit the same miscalculation. I’m likely to double the volume to make them delighted.

Thanks to Suncakemom for the awesome What Is Ganache.

Instructions

Chop the chocolate up or simply use chocolate chips.
Heat heavy cream then add the chocolate.
Mix until uniform texture is achieved.

Notes
Enjoy!
Nutrition (per serving)
Calories: 2005kcal (100%) Carbohydrates: 77g (26%) Protein: 35g (70%) Fat: 212g (326%) Saturated Fat: 131g (819%) Cholesterol: 326mg (109%) Sodium: 147mg (6%) Potassium: 2139mg (61%) Fiber: 39g (163%) Sugar: 2g (2%) Vitamin A: 3499IU (70%) Vitamin C: 1mg (1%) Calcium: 393mg (39%) Iron: 41mg (228%)

Rutabaga Fries

Is all food created equal or there are some more beautiful than the others? Let’s make rutabaga fries and find it out!

As I most recently have some time, I was searching on the internet a few days ago. In need of fresh, interesting tips, inspiring dishes that I have never tasted before, to impress my family with. Searching for a while unfortunately could not find any interesting things. Right before I thought to give up on it, I came across this fabulous and easy treat simply by accident on Suncakemom. It seemed so yummy on its photo, it required prompt action.
It was easy to imagine the way it’s created, its taste and just how much my husband will probably want it. Mind you, it is quite easy to keep happy the guy in terms of treats. Anyhow, I got into the webpage and simply used the precise instuctions that were combined with wonderful shots of the method. It really makes life less difficult. I can imagine that it’s a bit of a hassle to shoot snap shots in the midst of baking in the kitchen because you typically have sticky hands therefore i really appreciate the commitment she devote to build this blogpost .
Having said that I’m inspired presenting my personal formulas similarly. Appreciate your the thought.
I was tweaking the initial formula create it for the taste of my loved ones. I have to tell you that it was a great success. They prized the taste, the thickness and loved having a treat such as this during a stressful week. They ultimately asked for lots more, many more. Thus the next time I’m not going to commit the same mistake. I am gonna twin the volume to make them delighted.

This Rutabaga Fries Recipe is from SunCakeMom.

Peel the rutabaga. It has somewhat thick skin and the bigger the rutabaga is, it gets even worse.
Cut the rutabaga as we would do it with french fries about half inch / 1cm wide wedges. Try to cut them evenly otherwise the small pieces will get burnt while the big chunks hasn’t even warmed up.
Rub them with cooking oil and salt. Add optional spices and herbs if desired.
Place them onto a rack, parchment paper or baking sheet.
Put them into a 400°F / 200°C oven for 30 – 40 minutes.
Or just simply deep fry them as regular french fries until golden brown.

Baked Brie With Jam

Does picking up the wrong habit dooms our life or there is hope for a change? Let’s bake a brie and see which path leads to our fate!

As I recently have a little time, I was browsing on the web a few days ago. Attempting to find fresh, challenging thoughts, inspirational recipes that I’ve never tasted before, to delight my loved ones with. Looking for a long time unfortunately couldn’t come across lots of interesting things. Just before I thought to give up on it, I found this delicious and easy dessert simply by chance on Suncakemom. The dessert seemed so tempting
on its snapshot, that required prompt action.
It was not difficult to imagine just how it is created, its taste and how much boyfriend might want it. Mind you, it is very simple to impress him when it comes to puddings. Anyway, I visited the site and then followed the simple instuctions which were combined with nice photos of the procedure. It just makes life faster and easier. I can imagine that it’s a bit of a inconvenience to take photographs in the midst of baking in the kitchen as you will often have sticky hands and so i sincerely appreciate the time and effort she devote to make this post and recipe easily implemented.
Having said that I am inspired to present my own dishes in a similar way. Appreciate your the concept.
I was tweaking the original recipe create it for the taste of my family. I can mention it turned out an incredible success. They enjoyed the taste, the overall look and enjoyed getting a treat such as this in the midst of a hectic workweek. They ultimately asked for more, more and more. Thus the next occasion I am not going to commit the same miscalculation. I am going to double the quantity .

You can find the original Baked Brie With Jam at SunCakeMom

Sweet

Remove the brie from its box and unwrap it. Some brie come in a double wrapping of paper and plastic. Remove the plastic packaging, keep the paper on. If there is no paper packaging with our brie, just use a parchment paper to wrap it on one side of the brie.
Put the brie and paper wrapping back into its wooden box, so the paper seals the bottom. Remove excess paper if desired. If we have a dish that is slightly bigger than the brie use simply that without wrapping it with paper.
Place the cheese with its box onto a baking tray and put it onto the middle rack of a 350°F/180°C oven until the cheese inside melts and jiggles when the tray is moved for about 15 minutes.
Pour the honey or other sweet syrup on top and serve hot.
Enjoy!

Kielbasa Sausage Recipes

Looking for some tasty sausage or just want to know where things really are from? Let’s make Kielbasa sausage as they did of old!

As I currently have a little time, I had been searching on the internet yesterday. On the lookout for fresh, fascinating tips, inspiring dishes that I have never tasted before, to amaze my loved ones with. Hunting for a while unfortunately couldn’t discover lots of interesting things. Right before I wanted to give up on it, I came across this tempting and easy dessert simply by chance at Suncakemom. The dessert seemed so delightful on its photo, that required rapid actions.
It had been simple enough to imagine the way it’s created, how it tastes and just how much my hubby might want it. Actually, it is rather simple to keep happy the guy when it comes to puddings. Yes, I am a lucky one. Or perhaps he is.Anyway, I got into the page and used the comprehensive instuctions which were combined with nice snap shots of the process. It just makes life faster and easier. I can suppose it is a slight effort to take photographs in the midst of baking in the kitchen as you may usually have gross hands therefore i really appreciate the commitment she put in to make this post and recipe easily implemented.
With that said I am inspired to present my own, personal recipe in a similar way. Many thanks the thought.
I had been tweaking the initial mixture to make it for the taste of my family. I have to say it turned out a great success. They enjoyed the flavour, the overall look and loved having a delicacy like this in the middle of a lively week. They ultimately asked for even more, many more. So the next occasion I am not going to commit the same mistake. I’m likely to twin the volume .

This was made possible through SunCakeMom who provided the original Kielbasa Sausage Recipes.

Soak the casing into iced water and keep it there until finished. Replace the ice if necessary.
Grind the meat if necessary and measure the rest of the ingredients.
Mix everything together. Depending on what type of filling machine we have, prepare for its filling too. Stand mixers will require the meat to be rolled into easily swallowable logs.
Pull the casing onto the filler tube. Don’t forget to push about an inch / 2 cm filling out so the casing will slide on easier. Pull as much casing on as it is possible so we don’t have to keep replacing it.
Start pushing the filling out. Optionally make a knot at the end and punch a hole on the casing so the air can escape. Control the amount of meat gets into the casing by holding onto the casing around the tube or releasing it.
As the kielbasa comes off the tube, roll it up. If the casings break, just remove enough filling at the end, make a knot and carry on like at the beginning. If the casings dry out and it sticks on the tube, apply some water.
Make the links on the kielbasa sausage. Roast, fry, cook or freeze them as desired.

Strawberry Tartlets

Are tarts simplified pies created out of laziness or travelers of time without hastiness? Let’s make a strawberry tart and find it out!

As I currently have a little time, I had been browsing on the internet a few days ago. Looking for fresh, challenging tips, inspirational dishes that I have never used before, to amaze my family with. Hunting for a long time unfortunately could not discover too many interesting things. Right before I wanted to give up on it, I ran across this delightful and simple dessert simply by chance. The dessert seemed so mouth-watering on its snapshot, that called for fast actions.
It was not so difficult to imagine the way it’s made, its taste and how much my hubby will want it. Actually, it is rather simple to delight the man in terms of desserts. Anyhow, I visited the site: Suncakemom and then used the precise instuctions which were coupled with wonderful pictures of the operation. It just makes life less difficult. I could imagine that it is a slight hassle to shoot photos in the midst of cooking in the kitchen as you may ordinarily have sticky hands thus i sincerely appreciate the commitment she devote for making this post .
With that in mind I am encouraged to present my very own recipe in a similar way. Thanks for the thought.
I was tweaking the initial formula to make it for the taste of my loved ones. Need to mention it absolutely was an awesome outcome. They prized the flavor, the overall look and loved having a delicacy such as this during a stressful week. They ultimately asked for more, a lot more. Hence next time I’m not going to commit the same miscalculation. I’m going to double the amount to keep them pleased.

strawberry tart recipe first posted on suncakemom.

Crust

Combine crust ingredients in a medium size bowl. Use room temperature butter as it is easier to work with.
Work the butter and egg into the flour until it comes together by hand. A lot depends on the moisture content of the flour. If the dough is too dry and flaky, pour a little bit more water over the mixture. If it still sticks to the bowl or onto our hand after ten minutes of kneading then add a bit of more flour to it.
Put it onto a slightly floured surface. Flatten dough with a rolling pin into a circle shape.
Place it into a pie dish, press it evenly and poke it with a fork.
Place some weight on it.
Put it into the 350°F / 180°C preheated oven for at least 10 minutes for a lightly colored crust.

Filling

While the crust is cooling, prepare the filling. Beat cream cheese and sweetener of choice until creamy.
Add the chopped strawberries and beat until fully incorporated.
Beat cream and lemon juice until hard.
Fold cream cheese and cream together. Keep it in the fridge until needed.

Topping

Slice the strawberries up or just simply rinse and pat them dry depending on what kind of decoration we like to apply on top of the tart.

Assembly

Pour the filling into the tart crust.
Decorate it with the strawberries. Keep it in the fridge until served.

Chicken Noodle Soup Recipe

Is life more than just the glimmer of light reflecting on its surface? Let’s make a noodle soup and see if we can reach the depth of it!

As I lately have a little time, I had been surfing on the web a few days ago. Trying to get fresh, intriguing thoughts, inspiring dishes that I have never tasted before, to amaze my loved ones with. Searching for a while unfortunately could not find any interesting things. Just before I thought to give up on it, I discovered this delicious and simple treat by chance. The dessert seemed so fabulous on its photos, that called for rapid actions.
It was easy to imagine the way it is made, its taste and just how much my hubby will probably want it. Actually, it is extremely easy to please the guy when it comes to treats. Anyways, I went to the website: Suncakemom and simply followed the step-by-step instuctions that have been combined with wonderful shots of the method. It just makes life much simpler. I can suppose it is a bit of a hassle to shoot photographs down the middle of cooking in the kitchen because you most often have gross hands thus i sincerely appreciate the effort and time she put in to make this blogpost .
With that said I’m inspired presenting my very own recipes in the same way. Thanks for the thought.
I had been fine tuning the original recipe to make it for the taste of my loved ones. Need to say that it was an incredible outcome. They loved the flavour, the consistency and loved having a delicacy like this in the midst of a busy week. They ultimately requested more, a lot more. So the next time I’m not going to commit the same miscalculation. I am going to twin the quantity to get them happy.

This ramen soup vegetarian was first posted on SunCakeMom.

Pour soy sauce and toasted sesame oil into a pot then add ginger, red bell peppers, celery and garlic.
On high heat saute until the garlic gets fragrant for about 2 -3 minutes.
Fill it up with the broth / stock. We can dilute the soup with some water so we’ll have more at the end but don’t add more water then the broth.
With the lid on, bring it to boil then turn the heat to medium to low and let it simmer 10 – 15 minutes. The longer ginger and garlic are in the soup the more pronounced their flavor will be. Try the soup and remove them when desired.
Add the noodles. On keto, we can finely slice vegetables like zucchini, leek or we can simply use low carb Shiritaki / konjac noodles.
With the lid on cook until the noodles soften up for about 3 – 5 minutes. Serve with finely sliced scallion garnish.

Strawberry Lemonade Cake Cupcake

Should we let our life overflow with love or refrain ourselves from vanities? It’s not a question when making a Strawberry lemonade cake.

As I lately have some time, I had been looking on the web last week. On the lookout for fresh, challenging thoughts, inspiring recipes that We have never used before, to treat my loved ones with. Hunting for a long time unfortunately couldn’t discover lots of interesting stuff. Right before I thought to give up on it, I ran across this fabulous and easy dessert by chance on Suncakemom. The dessert looked so scrumptious on its image, it required prompt action.
It was simple enough to imagine how it’s made, how it tastes and how much my hubby will probably like it. Mind you, it is extremely easy to keep happy the guy when it comes to treats. Yes, I’m a lucky one. Or perhaps he is.Anyhow, I got into the page and simply followed the step by step instuctions that had been accompanied by great graphics of the process. It just makes life faster and easier. I can imagine that it’s a bit of a inconvenience to take pics in the midst of baking in the kitchen as you usually have gross hands so I seriously appreciate the hard work she placed in to build this post .
That being said I’m encouraged presenting my own, personal formulas in a similar fashion. Many thanks the idea.
I was tweaking the initial formula to make it for the taste of my loved ones. Need to tell you it absolutely was an incredible success. They enjoyed the flavour, the structure and loved getting a treat like this in the midst of a stressful week. They quite simply demanded more, many more. Thus the next occasion I’m not going to make the same mistake. I am going to double the amount .

For more Strawberry Lemonade Cake Cupcake check out SunCakeMom

Cake

Measure flour, baking powder, salt, lemon zest, butter, eggs, vanilla extract and milk into a mixing bowl.
Combine all ingredients together.
Mix in lemon juice or lemon extract. Lemon juice will whiten the batter. Acid in lemon juice can negatively affect the baking soda’s ability to raise the cake. A teaspoon of baking soda can help neutralize its effect on the cake.
Pour the batter into parchment papered and/or greased baking form.
Bake in a 360°F / 180°C preheated oven’s bottom rack until the top gets some golden brown spots for about 30 – 40 minutes.
Let it cool a bit then shape it by removing the uneven parts.
Slice the cake into three layers.

Jam

Bring the chopped strawberries and water to boil with the lid on.
Cook the strawberries on medium heat until soft.
Mash them or use a hand blander to puree.
Filter out the bits and seeds. This can take long and require some stirring and mashing things through the sieve.
Put the strawberry puree back to the cook top and reduce it by half or even more. The thicker it will be the more we can stack onto the layers. We can use a somewhat runny jam too but it will seep into the holes and crevices which still taste good but won’t look that nice. Any leftover jam can be canned and stored for later.

Cream

Beat cream cheese and sweetener of choice until soft and creamy.
Mix in the strawberries.
Beat heavy cream and lemon juice until hard peaks form.
Mix cream cheese and heavy cream together. Taste and add more sweetener if desired.

Assembly

Spread strawberry jam onto the first layer and spread it out evenly. If we haven’t reduced the strawberry to a thick spread then seal the outer side of the cake with some frosting first so the jam won’t escape sneakily.
Repeat it with the second layer.
On the third topmost layer skip the jam as it can ruin the even spreading of the cream and go straight to the frosting. Spread about half of the cream cheese frosting on top and the other half on the side of the cake.

Fried Cabbage And Bacon

Is cooking the ultimate bastion of flavors or eating raw has its strongholds too? Let’s make fried cabbage bacon and see which rules!

As I currently have a little time, I was browsing on the web a few days ago. On the lookout for fresh, intriguing tips, inspiring dishes that I have never used before, to treat my family with. Searching for a while but couldn’t discover too many interesting things. Just before I thought to give up on it, I stumbled on this fabulous and simple treat by chance. It seemed so delicious on its photos, it called for immediate actions.

It had been not so difficult to imagine how it is made, how it tastes and how much my hubby will love it. Mind you, it is very easy to delight the man in terms of cakes. Anyhow, I went to the webpage: Suncakemom and used the step by step instuctions which were combined with nice images of the method. It just makes life much easier. I can suppose it’s a slight inconvenience to shoot pics down the middle of cooking in the kitchen as you may most often have gross hands thus i highly appreciate the time and effort she placed in to make this blogpost .

With that said I’m encouraged presenting my own recipe in a similar way. Many thanks for the concept.

I had been tweaking the main formula to make it for the taste of my family. I must mention it was an incredible outcome. They prized the flavour, the structure and enjoyed getting a treat like this in the middle of a hectic week. They ultimately wanted even more, a lot more. Hence the next occasion I am not going to make the same mistake. I am likely to multiply the quantity .

For more Fried Cabbage And Bacon check out SunCakeMom

Slice up the bacon/pancetta/guanciale. The more fat it has, the better it would be.

On medium heat, render the fat out.

Increase the heat. Mix in the diced up onion and saute until the onion gets a glassy / translucent look for about 5 minutes. Add more fat or oil if neccessary.

Lower the heat to medium to low and slowly caramelize the onions for about 10 -15 minutes.

Meanwhile the onions are getting fried, cut the cabbage up.

Increase the heat to high then mix in the diced up cabbage with the onion and bacon.

Keep stirring the cabbage to prevent it to burn down until it collapses and fry through for about 5 – 10 minutes.

Buttercream Frosting For Cake

Looking for the perfect filling or something to cover up an almost perfect cake? Let’s whip up one of these buttercream frosting recipes!

As I most recently have some time, I had been looking on the internet yesterday. Attempting to find new, interesting thoughts, inspirational dishes that I’ve never tried before, to impress my family with. Searching for a long time unfortunately couldn’t find any interesting stuff. Right before I wanted to give up on it, I came upon this scrumptious and simple treat by luck at Suncakemom. It seemed so delightful on its image, it required urgent actions.

It had been not so difficult to imagine how it’s created, its taste and how much boyfriend is going to like it. Actually, it is quite simple to impress the guy in terms of cakes. Anyhow, I visited the webpage and then used the simple instuctions which were accompanied by impressive images of the procedure. It really makes life much easier. I could imagine that it is a slight inconvenience to shoot photos in the middle of cooking in the kitchen as you may will often have sticky hands thus i highly appreciate the hard work she put in to build this blogpost and recipe conveniently followed.

That being said I’m inspired presenting my own, personal recipe in the same way. Thanks for the idea.

I had been tweaking the main formula to make it for the taste of my loved ones. I have to mention it had been a terrific outcome. They enjoyed the flavour, the thickness and loved having a treat such as this during a busy week. They ultimately wanted even more, more and more. Thus the next occasion I’m not going to commit the same mistake. I’m going to multiply the quantity to keep them happy.

This Buttercream Frosting Vanilla post was made possible by SunCakeMom

Beginner – American

Beat room temperature butter until it gets a white ivory color.

Add the sweetener and beat it some more. If sugar like crystalized sweetener is used, beat it until the sugar is dissolved. Syrups like honey or agave need only a minute of thorough mixing. Add heavy cream or a bit of milk to thin out the cream if desired.

Add flavoring and coloring as desired.

Enjoy!