Chocolate Mirror Glaze Recipe

Is there more to our food than meets the eyes or we get what we see? Let’s make chocolate glaze and see if our cakes will be the same!

As I currently have some time, I was looking on the web yesterday. In need of new, intriguing ideas, inspiring meals that I’ve never tried before, to treat my family with. Looking for quite some time yet couldn’t come across any interesting things. Right before I thought to give up on it, I ran across this yummy and easy dessert by chance. It seemed so scrumptious on its photo, it required quick actions.

It had been easy to imagine just how it is created, how it tastes and just how much my husband might enjoy it. Mind you, it is rather easy to keep happy him when it comes to desserts. Anyways, I visited the webpage: Suncakemom and then used the precise instuctions that have been combined with impressive graphics of the process. It just makes life quite easy. I can imagine that it’s a bit of a hassle to shoot snap shots in the midst of cooking in the kitchen as you may most often have gross hands so that i sincerely appreciate the time and energy she placed in to make this blogpost and recipe conveniently followed.

With that in mind I am encouraged to present my own recipes in a similar fashion. Many thanks the thought.

I was fine tuning the original mixture to make it for the taste of my family. I have to say it had been an incredible outcome. They prized the taste, the thickness and enjoyed having a sweet like this in the middle of a hectic workweek. They quite simply asked for more, more and more. Hence the next time I am not going to make the same mistake. I’m likely to twin the quantity to make them delighted.

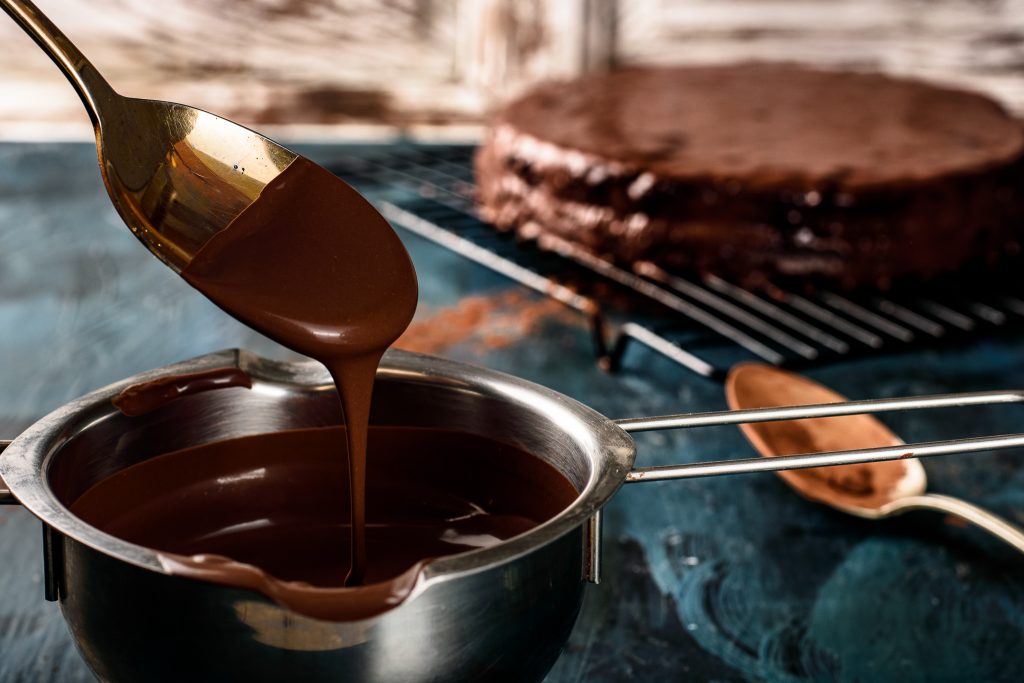
More Mirror Glaze like this on SunCakeMom

Gelatine

We can use gelatine powder or gelatine sheets, it makes no difference. Soak gelatine (aka bloom) in water until it gets a rubbery consistency.

Chocolate

Preferably in a double boiler, heat water and dissolve the cocoa powder by slowly stirring it until smooth and lump free. A simple pot on the heater can also be used but mind not to burn the cocoa.

Once we get a smooth cocoa paste, slowly stir in the cream. Be careful not to create bubbles while stirring. This recipe will result a light colored mirror glaze. For darker glaze just replace parts of the cream or the whole of it with water.

Dissolve the rubbery gelatine and add any additional sweetener if required.

Filter the mirror glaze through a fine mashed sieve as a precaution. As we haven’t used chocolate but only cocoa powder it shouldn’t be any hard pieces floating around but it’s better to stay safe then sorry.

Set it aside and let it cool to 86°F / 30°C. This part is important as too cold glaze will not spread as easily creating bumps and uneven surface while too hot glaze will run off the cake, not leaving thick enough layer to cover the cake.

Before pouring the glaze on a cake, check for any skin on top of the glaze. We used cream not milk so sometimes there isn’t skin on top but if there is any, just strain the glaze again and then pour it over the cake. Also check for air bubbles and pour the glaze form a low height to prevent the creation of undesired bubbles in the glaze.

Kielbasa And Cabbage

Is there any difference between sausages of the world or all casings hold the same? Let’s make fried cabbage and sausage with Kielbasa and see!

As I lately have some time, I was searching on the web the other day. In need of fresh, stirring tips, inspiring recipes that We have never tasted before, to impress my family with. Looking for quite some time yet couldn’t find lots of interesting things. Right before I thought to give up on it, I came across this delightful and simple dessert simply by chance. It seemed so yummy on its photo, it required rapid action.

It was simple enough to imagine just how it’s made, how it tastes and how much my husband is going to enjoy it. Actually, it is extremely simple to impress him in terms of desserts. Yes, I am a blessed one. Or possibly he is.Anyway, I visited the blog: Suncakemom and simply used the comprehensive instuctions that were accompanied by superb images of the task. It really makes life faster and easier. I could suppose it is a bit of a effort to take pics in the midst of cooking in the kitchen as you usually have gross hands and so i genuinely appreciate the commitment she devote to build this post .

With that said I’m encouraged presenting my own dishes in a similar fashion. Many thanks for the thought.

I had been fine tuning the main formula to make it for the taste of my family. I have to say it absolutely was a great outcome. They enjoyed the flavour, the consistency and loved having a delicacy like this during a busy workweek. They ultimately asked for more, many more. So the next time I’m not going to commit the same miscalculation. I’m going to double the amount .

The origanal Fried Cabbage And Sausage is from SunCakeMom

Heat oil or lard to high temperature and saute onion until it gets a glassy / translucent look for about 3-5 minutes.

Add sliced kielbasa and garlic then saute until sausages are slightly seared for another 3 – 5 minutes. Fresh sausages will render out a good deal of fat at this stage.

Mix in the finely sliced cabbage and saute until it collapses somewhat for about 3 – 5 minutes.

Mix in vinegar, optional salt and pepper to taste. Stir fry on medium heat until some of the vinegar harshness disappears and the flavors come together nicely for another 3 – 5 minutes.

Recipe For Raisin Bread

How far our knowledge can reach in the ever expanding universe or does it matter? Make a raisin bread to find the answer of all times.

As I recently have a little time, I was searching on the internet last week. Trying to find new, intriguing tips, inspiring recipes that I’ve never tested before, to surprise my family with. Searching for a while yet could not come across lots of interesting stuff. Right before I thought to give up on it, I ran across this delicious and simple treat simply by chance. It looked so yummy on its image, it called for rapid actions.

It was simple enough to imagine the way it’s created, its taste and just how much my hubby is going to love it. Mind you, it is extremely simple to keep happy him when it comes to cakes. Anyways, I went to the site: Suncakemom and then used the simple instuctions that had been accompanied by superb pics of the method. It just makes life faster and easier. I can suppose it’s a slight effort to take photos in the middle of cooking in the kitchen because you usually have sticky hands therefore i really appreciate the commitment she placed in to make this blogpost .

With that in mind I’m empowered to present my personal recipe similarly. Many thanks for the concept.

I had been tweaking the main formula to make it for the taste of my family. I can tell you that it was an awesome success. They enjoyed the flavour, the structure and enjoyed getting a delicacy like this in the middle of a hectic week. They basically wanted lots more, many more. So next time I’m not going to commit the same miscalculation. I am likely to multiply the quantity to make them happy.

Recipe For Raisin Bread first published on suncakemom.

In a large bowl add the flour, eggs, butter, yeast, milk and the raisins.

Knead them together.

With oiled or floured hands gather the dough into a ball then gently apply a thin coat of oil on it that will prevent it from drying out.

Cover it then put it to a 68°F – 81°F / 20°C – 27°C place to rise for 60 – 120 minutes. Most likely it won’t double due to the weight of the raisins but it should be raised and softer than at the beginning.

This recipe is for two loaf so cut the dough into two.

Gently form the dough into a log and put it into a bread pan.

Cover the dough again and put it back to the 68°F – 81°F / 20°C – 27°C place to rise for 30 – 60 minutes.

Whisk egg yolk with a bit of water or vanilla extract and brush it on top of the dough.

Put the dough onto the bottom rack of a preheated 365°F / 180°C oven and bake it until its top is getting a lovely golden brown color, for about 30 – 40 minutes.

Peanut Butter Balls Keto

Thriving to save the world or just looking for something quick to please the crowd? Let’s make peanut butter balls and enjoy the ride!

As I lately have a little time, I was surfing on the internet yesterday. Trying to get new, interesting ideas, inspirational meals that I have never tasted before, to treat my family with. Searching for a while yet couldn’t come across any interesting stuff. Right before I wanted to give up on it, I ran across this tempting and simple treat simply by accident on Suncakemom. It seemed so delightful on its snapshot, that called for urgent actions.

It was not difficult to imagine just how it is made, how it tastes and how much my husband will want it. Actually, it is very easy to keep happy the guy when it comes to treats. Yes, I’m a blessed one. Or perhaps he is.Anyway, I visited the site and used the step-by-step instuctions that had been combined with wonderful shots of the method. It really makes life less difficult. I can imagine that it is a slight inconvenience to take photographs down the middle of baking in the kitchen because you usually have gross hands and so i really appreciate the hard work she put in to build this blogpost and recipe conveniently implemented.

With that in mind I’m encouraged to present my very own formulas similarly. Many thanks for the concept.

I had been tweaking the original mixture to make it for the taste of my loved ones. I can say it turned out a terrific outcome. They prized the taste, the structure and loved having a treat like this in the middle of a stressful workweek. They quite simply demanded even more, a lot more. So the next occasion I’m not going to commit the same miscalculation. I’m gonna twin the amount .

You can find more Recipe For Peanut Butter Balls at SunCakeMom

Slightly melt butter.

Mix melted butter, optional sweetener and peanut butter. Use roasted peanut butter for more complex flavor and try to use one that is sort of solid on room temperature.

Cool the mixture in the fridge or in the freezer for at least an hour. We need to roll balls out of them so don’t freeze it.

Make the peanut balls. It’s quite messy business so be prepared. Put the balls back into the fridge or freezer to prepare them for dipping in chocolate.

Melt chocolate.

Dip the peanut butter balls into chocolate.

Smudge in the holes then put them back into the fridge or freezer for half an hour or more and serve them from there.

Thousand Island Recipe

Looking for a tasty condiment or just forgot to make the dressing for the salad? Thousand island dressing is here to help!

As I lately have a little time, I had been looking on the web a few days ago. In search of fresh, interesting tips, inspiring recipes that I’ve never used before, to astonish my family with. Hunting for quite some time but couldn’t discover too many interesting stuff. Just before I thought to give up on it, I ran across this delightful and easy treat by chance. The dessert seemed so fabulous on its photo, that required fast actions.

It had been easy to imagine how it is created, its taste and how much my husband might like it. Mind you, it is extremely easy to impress him in terms of desserts. Yes, I am a blessed one. Or possibly he is.Anyhow, I got into the webpage: Suncakemom and followed the simple instuctions that were coupled with wonderful pictures of the procedure. It really makes life much simpler. I can imagine that it is a bit of a inconvenience to shoot photos in the midst of baking in the kitchen as you normally have gross hands therefore i seriously appreciate the commitment she put in to build this blogpost and recipe easily followed.

With that in mind I am encouraged presenting my own, personal dishes similarly. Appreciate your the idea.

I had been fine tuning the main recipe create it for the taste of my family. I’ve got to say it turned out an awesome outcome. They prized the flavour, the structure and loved having a sweet like this during a stressful week. They basically asked for lots more, many more. Hence next time I’m not going to make the same miscalculation. I’m gonna twin the quantity .

You can find the original Thousands Island Dressing Recipe and more at SunCakeMom

Mayonnaise

Break and separate eggs. We will only need the yolks. Get the oil ready by pouring it into a measuring jug. Add the mustard to the egg yolks.

Whisk yolks in a mixing bowl. Pour oil very slowly into the bowl of whisked yolks.

Add the lemon juice and salt. Keep whisking and adding the second half of the oil until the end.

Tomato Sauce

Saute the diced onion on high heat until it gets a glassy / translucent look for about 3-5 minutes. Add the crushed garlic and saute until it gets fragrant for about a minute.

Mix in the tomatoes or the pureed tomato and add in the vinegar and/or the optional white wine.

Cook it on low heat for about 5 – 10 minutes or until the sauce gets the desired thickness. Sprinkle in the paprika and optional hot spices then cook it for another minute.

Assembly

Mix all the ingredients together.

Ham Hock And Beans Soup

Come across a bunch of ham hocks and have some spare time? Let’s make the most delicious pork dish ever or let’s make two at the same time!

As I lately have some time, I had been searching on the web the other day. Looking for new, exciting tips, inspiring meals that I’ve never tasted before, to treat my family with. Hunting for quite some time yet could not find too many interesting stuff. Just before I thought to give up on it, I came across this tempting and simple treat simply by chance at Suncakemom. It seemed so yummy on its photo, that called for rapid actions.

It absolutely was not so difficult to imagine how it is created, its taste and just how much my husband might enjoy it. Mind you, it is rather simple to keep happy the guy when it comes to desserts. Anyways, I got into the blog and then followed the step-by-step instuctions that were accompanied by wonderful images of the process. It really makes life faster and easier. I can imagine that it’s a bit of a inconvenience to take snap shots in the midst of baking in the kitchen as you may ordinarily have sticky hands therefore i genuinely appreciate the time and energy she devote for making this blogpost .

That being said I am empowered to present my own, personal recipe in a similar way. Thanks for the concept.

I had been fine tuning the main mixture create it for the taste of my family. I have to mention it absolutely was a terrific success. They loved the taste, the structure and enjoyed having a delicacy such as this in the middle of a lively workweek. They ultimately requested more, a lot more. So the next occasion I am not going to make the same miscalculation. I am likely to twin the volume .

This was made possible through SunCakeMom who provided the original Ham Hock In Soup.

Ham hock soup with beans

Pour oil into a pot and on high heat saute the diced onion, celery, carrots and salt until the onion gets a glassy / translucent look for about 3 -5 minutes.

Mix in the diced garlic, black pepper and the ham hocks. If we have quick cooking beans or any other legumes like lentils, we have to precook the ham hock now. Pour water into to the pot until the ham hocks are submerged, bring it to boil and on low heat simmer them for an hour.

Add beans, tomatoes and fill the pot up with water until all the ingredients are submerged.

Put the lid on and bring the water to boil then simmer until the beans are ready on low heat which could be anywhere between 60 – 120 minutes. Optionally, add more vegetables to the soup like broccoli, brussel sprouts 10 minutes before finishing the soup.

Pita Bread Recipe

Dreaming about making pitas at home for ages or just driven by a sudden impulse to glorify the day? These pita breads will please both!

As I recently have a little time, I was looking on the internet last week. In search of fresh, stirring ideas, inspirational dishes that I’ve never tested before, to amaze my loved ones with. Searching for quite some time but couldn’t find any interesting stuff. Right before I wanted to give up on it, I discovered this fabulous and simple treat simply by accident over Suncakemom. It looked so scrumptious on its photos, it called for urgent action.

It was easy to imagine the way it is created, how it tastes and just how much my hubby will enjoy it. Actually, it is extremely simple to delight the man when it comes to cakes. Anyways, I visited the website and simply followed the step by step instuctions that were combined with nice shots of the method. It just makes life much easier. I can suppose it’s a slight hassle to take pics in the midst of cooking in the kitchen because you ordinarily have gross hands so that i highly appreciate the hard work she put in to build this post .

With that said I am encouraged to present my very own dishes in a similar fashion. Many thanks for the idea.

I was tweaking the initial formula create it for the taste of my loved ones. I’ve got to say that it was a terrific success. They loved the flavor, the consistency and enjoyed having a delicacy like this in the middle of a hectic workweek. They basically requested even more, a lot more. Thus next time I am not going to make the same mistake. I’m going to twin the volume to keep them pleased.

The original Pita Bread is provided by SunCakeMom

Starter dough

Mix water, flour and a bit of fresh yeast in an airtight container. Close the lid and put it in the fridge for 6 hours. This step is optional and can be skipped entirely.

Pita dough

Measure flour, yeast, salt, olive oil and water. Add dough starter too if used.

Knead it together until a uniform sticky dough forms. We need to have a relatively moist somewhat sticky dough.

Lightly rub the dough with oil to prevent it from drying out.

Cover it then place it to a 68°F – 81°F /20°C – 27°C corner to rise for about 45 – 90 minutes. With a bit of luck and right temperature, it will double in size.

Take the dough out, cut it in two then gently form two logs out of them. Try not to press much air out of the dough. This step is only necessary to help us make similar pitas. If size is not important, this step can be skipped.

Cut up the dough into equal pieces. Our favorite size is about 2 oz / 60g.

Roll them gently into balls. In doubt how to roll the dough? Check out: How to roll bread roll No.1

On a heavily floured surface roll them out into 6″/ 14 cm diameter discs. Make sure they don’t stick while rolling them out.

Place the rolled out discs onto a floured surface. Optionally sprinkle some water on top to prevent them to dry out, cover them with a kitchen towel then place them to a 68°F – 81°F /20°C – 27°C corner to rise for 30 minutes.

Not many of us is capable to shovel down 20 pitas in a day. Rub oil on the unused dough and in an airtight container, put them into the fridge for another day.

Heat up a non-stick or even better cast iron skillet medium to high. Too high temperature will scorch the pita creating holes where the water vapor can escape instead of puffing up our pitas. Place the pita upside down onto the hot skillet. In about 30 – 60 seconds bubbles should appear on the top of the dough.

We should be good to flip the pita over. When we try to lift the pita with a spatula and feel resistance, carefully try to separate the dough from the skillet without tearing. Consider lowering the heat or sprinkling flour on top of the dough before flipping it into the skillet.

With a bit of luck our dough should start puffing up in 1 – 2 minutes.

If it doesn’t puff up, try to find the hole where the vapor escapes and pressing on it with the spatula. It won’t be perfectly round but it will be just as tasty as the others.

Place the pitas under a kitchen towel until serving to prevent them from drying out.

Meat Pie

Is a shell just a vessel meant to hold something more divine or the outside is equally important? Let’s make a meat pie to find it out!

As I most recently have a little time, I had been searching on the internet the other day. Trying to find new, interesting tips, inspirational meals that We have never tried before, to amaze my family with. Hunting for a while but could not come across lots of interesting things. Just before I thought to give up on it, I stumbled on this delicious and simple dessert simply by luck at Suncakemom. It looked so tempting

on its pic, it called for urgent actions.

It absolutely was simple enough to imagine the way it is made, how it tastes and how much boyfriend will love it. Actually, it is quite easy to please the guy in terms of treats. Yes, I am a blessed one. Or possibly he is.Anyway, I visited the website and simply followed the simple instuctions which were coupled with nice pictures of the procedure. It really makes life much simpler. I could imagine that it is a slight inconvenience to shoot snap shots down the middle of baking in the kitchen because you typically have sticky hands thus i really appreciate the effort and time she devote to build this blogpost .

Having said that I’m encouraged to present my own dishes in the same way. Appreciate your the thought.

I was fine tuning the original recipe to make it for the taste of my family. I can say that it was an incredible success. They loved the flavor, the overall look and enjoyed getting a delicacy like this in the middle of a stressful workweek. They basically demanded lots more, many more. Hence next time I am not going to commit the same mistake. I’m likely to multiply the quantity .

This Meat Pie Recipe is from SunCakeMom.

Advanced

Filling

Saute onion until it gets a translucent, glassy look then add diced pepper, paprika, garlic, tomato, salt, black pepper, cumin and carrot.

Add the meat and mix all together well.

Pour wine and water until the meat is submerged. Put the lid on then cook on low heat until meat is soft and melting tender for about 3-4 hours. Stir occasionally and refill liquid if it reduces below ¾ of the meat. Let it cool for 20 minutes before using it.

Dough

Knead flour, butter, baking powder, egg and water together.

On a lightly floured surface roll it out to a about a ¼” / 0.5cm thickness.

If we are lucky enough to have big cookie cutters that cover the bottom of our baking form, use them. Otherwise just cut the dough to size by whatever means possible.

Cut the lids out too. For the lids we can use the same dough but also puff pastry that gives additional texture to our pies.

Assembly

Fill the dough up with the filling.

Place the lid on and close it by pressing around the edges. Try to seal it tight.

Beat egg yolk and brush the top of the meat pies then put them into a 360°F / 180°C preheated oven until the top is golden brown for 30 – 40 minutes.

Roasted Mushroom Garlic

Our life has its roots deeply embedded in the cultures of our past. Let’s roast some mushrooms and see how deep those roots really are!

As I most recently have a little time, I had been surfing on the web yesterday. Trying to get fresh, exciting thoughts, inspirational meals that We have never tried before, to surprise my loved ones with. Searching for a long time unfortunately couldn’t discover any interesting things. Just before I thought to give up on it, I came across this tempting and simple dessert simply by chance. It looked so mouth-watering on its image, that required rapid actions.

It was not so difficult to imagine how it is made, its taste and how much boyfriend might like it. Actually, it is very simple to keep happy the guy in terms of desserts. Yes, I am a lucky one. Or possibly he is.Anyhow, I visited the site: Suncakemom and followed the detailed instuctions that were accompanied by wonderful graphics of the method. It really makes life less difficult. I could imagine that it’s a slight inconvenience to take photographs down the middle of baking in the kitchen as you may most often have gross hands thus i seriously appreciate the hard work she placed in to build this post .

With that said I’m empowered presenting my own recipes in a similar fashion. Appreciate your the idea.

I was fine tuning the original formula to make it for the taste of my loved ones. Need to tell you it had been a terrific outcome. They enjoyed the flavour, the consistency and enjoyed having a treat like this in the middle of a hectic workweek. They basically asked for more, more and more. Thus the next time I’m not going to commit the same miscalculation. I’m likely to double the quantity to make them delighted.

Roasted Mushrooms Recipe is from suncakemom.

Rinse the mushrooms if necessary and mix them with all the ingredients.

Place the seasoned mushrooms into a 390°F / 200°C preheated oven for 10 – 15 minutes, until the mushrooms get a brownish roasted look.

Leek Soup Recipe

Can we come over our prejudices and enjoy that once was loathed? Let’s make a delicious leek soup to see the power of onions!

As I most recently have some time, I had been surfing on the internet yesterday. Looking to find new, fascinating thoughts, inspiring recipes that I have never tried before, to astonish my loved ones with. Hunting for a long time yet couldn’t come across lots of interesting stuff. Just before I thought to give up on it, I came upon this delightful and easy treat simply by chance. It seemed so fabulous on its photo, that called for fast actions.

It had been not difficult to imagine how it is created, its taste and how much my hubby will probably love it. Actually, it is very simple to keep happy the guy when it comes to puddings. Yes, I am a lucky one. Or maybe he is.Anyways, I visited the blog: Suncakemom and used the simple instuctions that had been accompanied by impressive images of the procedure. It really makes life rather easy. I can suppose it is a slight effort to take photos in the middle of cooking in the kitchen as you usually have sticky hands so that i pretty appreciate the effort and time she put in to make this post and recipe conveniently followed.

With that said I’m inspired presenting my own, personal dishes in the same way. Thanks for the idea.

I had been fine tuning the main mixture to make it for the taste of my loved ones. I’ve got to mention it was a terrific outcome. They loved the taste, the structure and enjoyed getting a treat like this during a stressful week. They ultimately demanded more, many more. So the next time I am not going to commit the same mistake. I’m gonna twin the quantity to get them pleased.

Leek Soup Recipe credit goes to Suncakemom.

Cut the leek into 4 parts along the long side without cutting it all the way through the end where the roots are. Rinse the leek and remove the roots too.

Remove the dried and the tough looking thick green bits too. Keep the light green looking tender parts.

Slice the leek up finely.

Heat oil in a pan and on high heat saute the sliced up leek until it collapses to about half of its size for about 3-5 minutes. We can use many more additional vegetables like cauliflower, broccoli, brussels sprouts or carrots. Mind that most vegetables needs 5 – 10 minutes sauteing time so start with those and only when they are tender enough, add the leek.

Fill the pan up with the broth. If we haven’t got our homemade broth or leftover chicken soup ready, just use some sort of ready made stock or even water with bouillon cubes.

Bring it to boil and add the cream. Let the flavors settle for a couple of minutes before serving.